
Getting Started with Cosmos Cloud: A Beginner's Guide to Self-Hosting
If you're new to the world of self-hosting and Docker, setting up your own server might seem like a difficult task, and well... You are right! It is very difficult. But do not go yet! Cosmos has been designed to make the journey a bit easier, but most importantly, must safer for you to take!
In this guide, I'll introduce you to Cosmos Cloud, a user-friendly platform that simplifies the process of managing your home server. By the end of this article, you'll have a basic understanding of how to set up and use Cosmos Cloud for your self-hosting needs.
What is Docker?
Docker is a platform that allows you to run applications in containers. Containers are isolated environments that contain everything the application needs to run, including the code, runtime, system tools, and libraries. This means that the application will run the same way regardless of the environment it's in, eliminating the "it works on my machine" problem. Docker is essential for running Cosmos Cloud.
Step 0: Your server
This guides kinda assume you already have a running server. If you don't, here's the general guideline: the best for is to use a Linux based server with a common distro such as Debian or Ubuntu. If you use Raspbian, make sure you are using the 64bits version.
Finally, make sure you keep that OS up to date, for your own security!
Step 1: Installing Docker
Before you can use Cosmos Cloud, you'll need to install Docker. To install Docker, follow the instructions on the official Docker website. Choose the instructions that correspond to your operating system.
If you use Linux, a simple command is enough
curl -fsSL https://get.docker.com | sudo shStep 2: Setting Up Cosmos Server
Once you have Docker installed, you can set up the Cosmos Server. To do this, you'll need to run a Docker command that pulls the Cosmos Server image from the Docker Hub and starts a new container.
The command you need to run can be found in the documentation: https://cosmos-cloud.io/doc/1%20index/
It is typically starting with docker run...
At the time of writting, the command is
docker run --network host --privileged --name cosmos-server -h cosmos-server --restart=always -v /var/run/docker.sock:/var/run/docker.sock -v /:/mnt/host -v /var/lib/cosmos:/config azukaar/cosmos-server:latestMake sure you expose the right ports (by default 80 / 443). It is best to keep those ports
intact, as Cosmos is meant to run as your reverse proxy. If you are running a Raspberry or
another ARM based server, you can use latest-arm64 for an arm architecture image.
if you are using Cosmos from one of the countries considered "high risk," you can prevent Cosmos
from blocking your IP by adding the following environment variable to your Docker run command:
-e COSMOS_SERVER_COUNTRY=IN. Replace "IN" with your country code. The following
countries are blocked by default: China (CN), Russia (RU), Turkey (TR), Brazil (BR), Bangladesh
(BD), India (IN), Nepal (NP), Pakistan (PK), Sri Lanka (LK), Vietnam (VN), Indonesia (ID), Iran
(IR), Iraq (IQ), Egypt (EG), Afghanistan (AF), and Romania (RO).
Now, let's break down the comand:
docker run means we are about to run a new docker container
(virtual machine)
-d means we are detached (ex. run in the background)
Port 4242 is a UDP port used for the Constellation VPN. For HTTP(S) it uses 80/443 by default but this can be changed with the environment variables COSMOS_HTTP_PORT and COSMOS_HTTPS_PORT. (ex. `-e COSMOS_HTTP_PORT=8080 -e COSMOS_HTTPS_PORT=8443`)
--privileged is an optional parameter to prevent clashes with SELinux an similar
tools, and to allow creating VPN tunnels
-h Cosmos-Server sets the hostname of the container, it is recommended not to change
it. It must be the same as --name
--restart=always means Cosmos will restart if it crashes or if the server restarts
-v /var/run/docker.sock:/var/run/docker.sock
Gives Cosmos the right to manage your other Docker containers
-v /:/mnt/host Gives cosmos
the right to see/edit your server files. It is required so you can manage your directories from
Cosmos, but you can ommit it if you dont want to
-v /var/lib/cosmos:/config
This is where Docker will save Cosmos' config files in your server
azukaar/cosmos-server:latest
the image to be used. It is a Debian based virtual machine with Cosmos up and running already
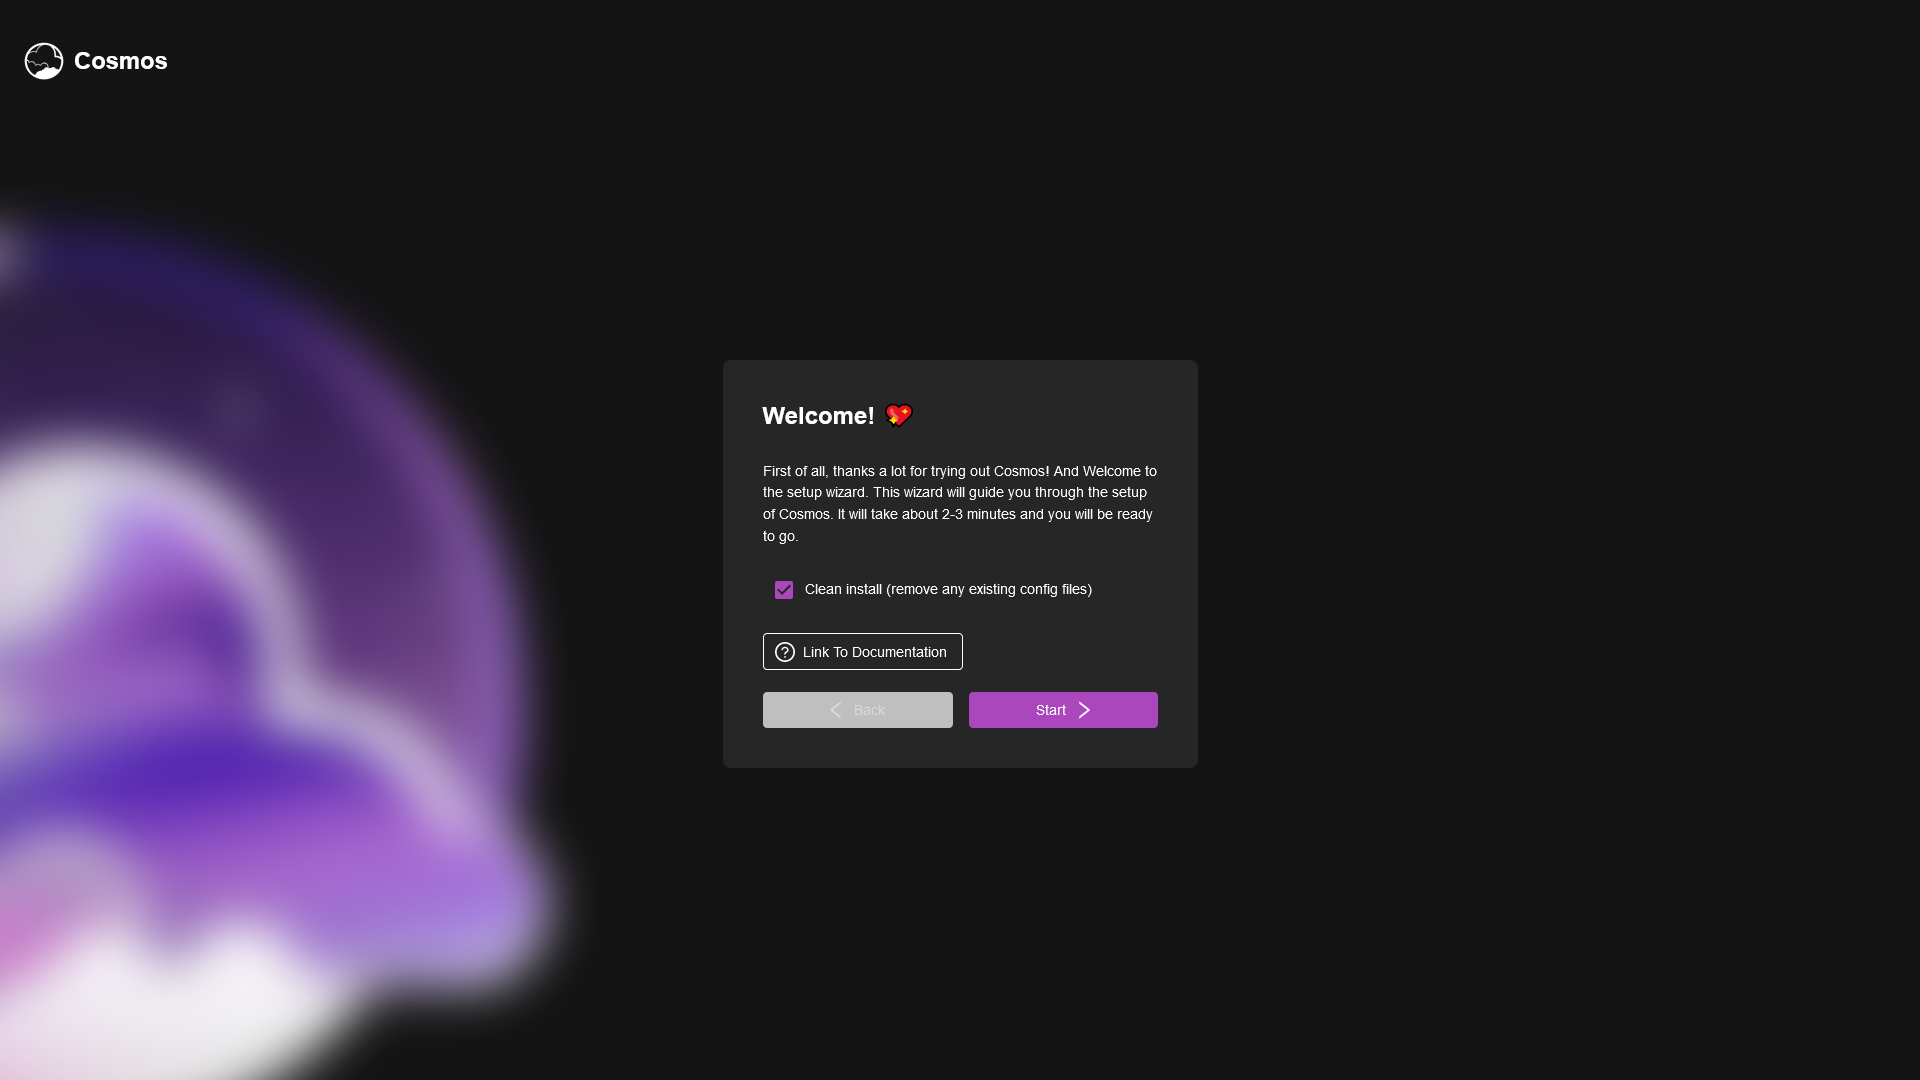
Step 3: Accessing Cosmos Cloud
After setting up the Cosmos Server, you can access Cosmos Cloud by opening a web browser and navigating to your server's IP address. This will bring you to the Cosmos Cloud interface, where you can start the graphical installer.
If youhave attempted to install Cosmos before, the "clean install" button will make sure that you are starting from a clean slate, and that no older config will get in the way.
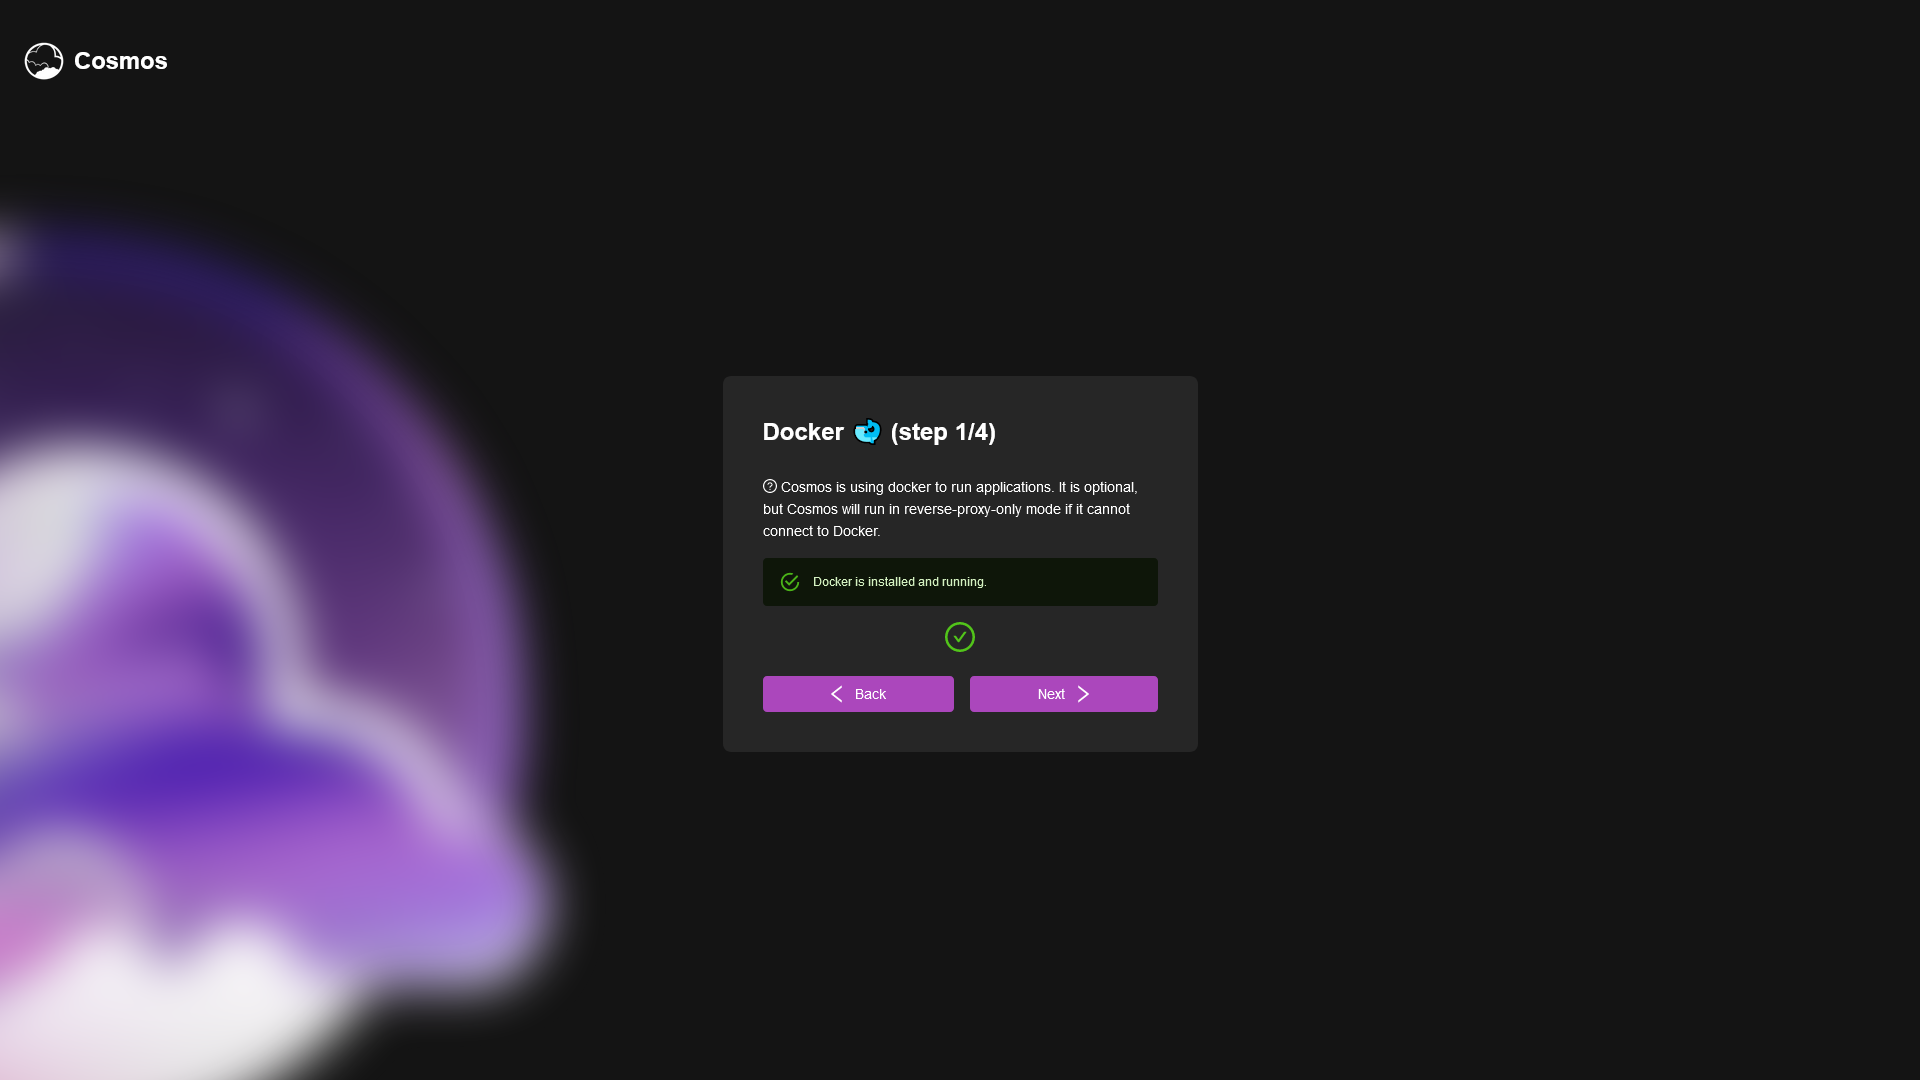
Once ready, press next and the next screen is very straightforward, it wil simply ask you to check that Cosmos can access Docker. If it's not the case, make sure Docker is properly installed and that nothing prevents the access (ex. any hardening software like SELinux).
Step 4: The Database
In this step, you'll create a database for Cosmos Cloud. This is where all your server's data will be stored.
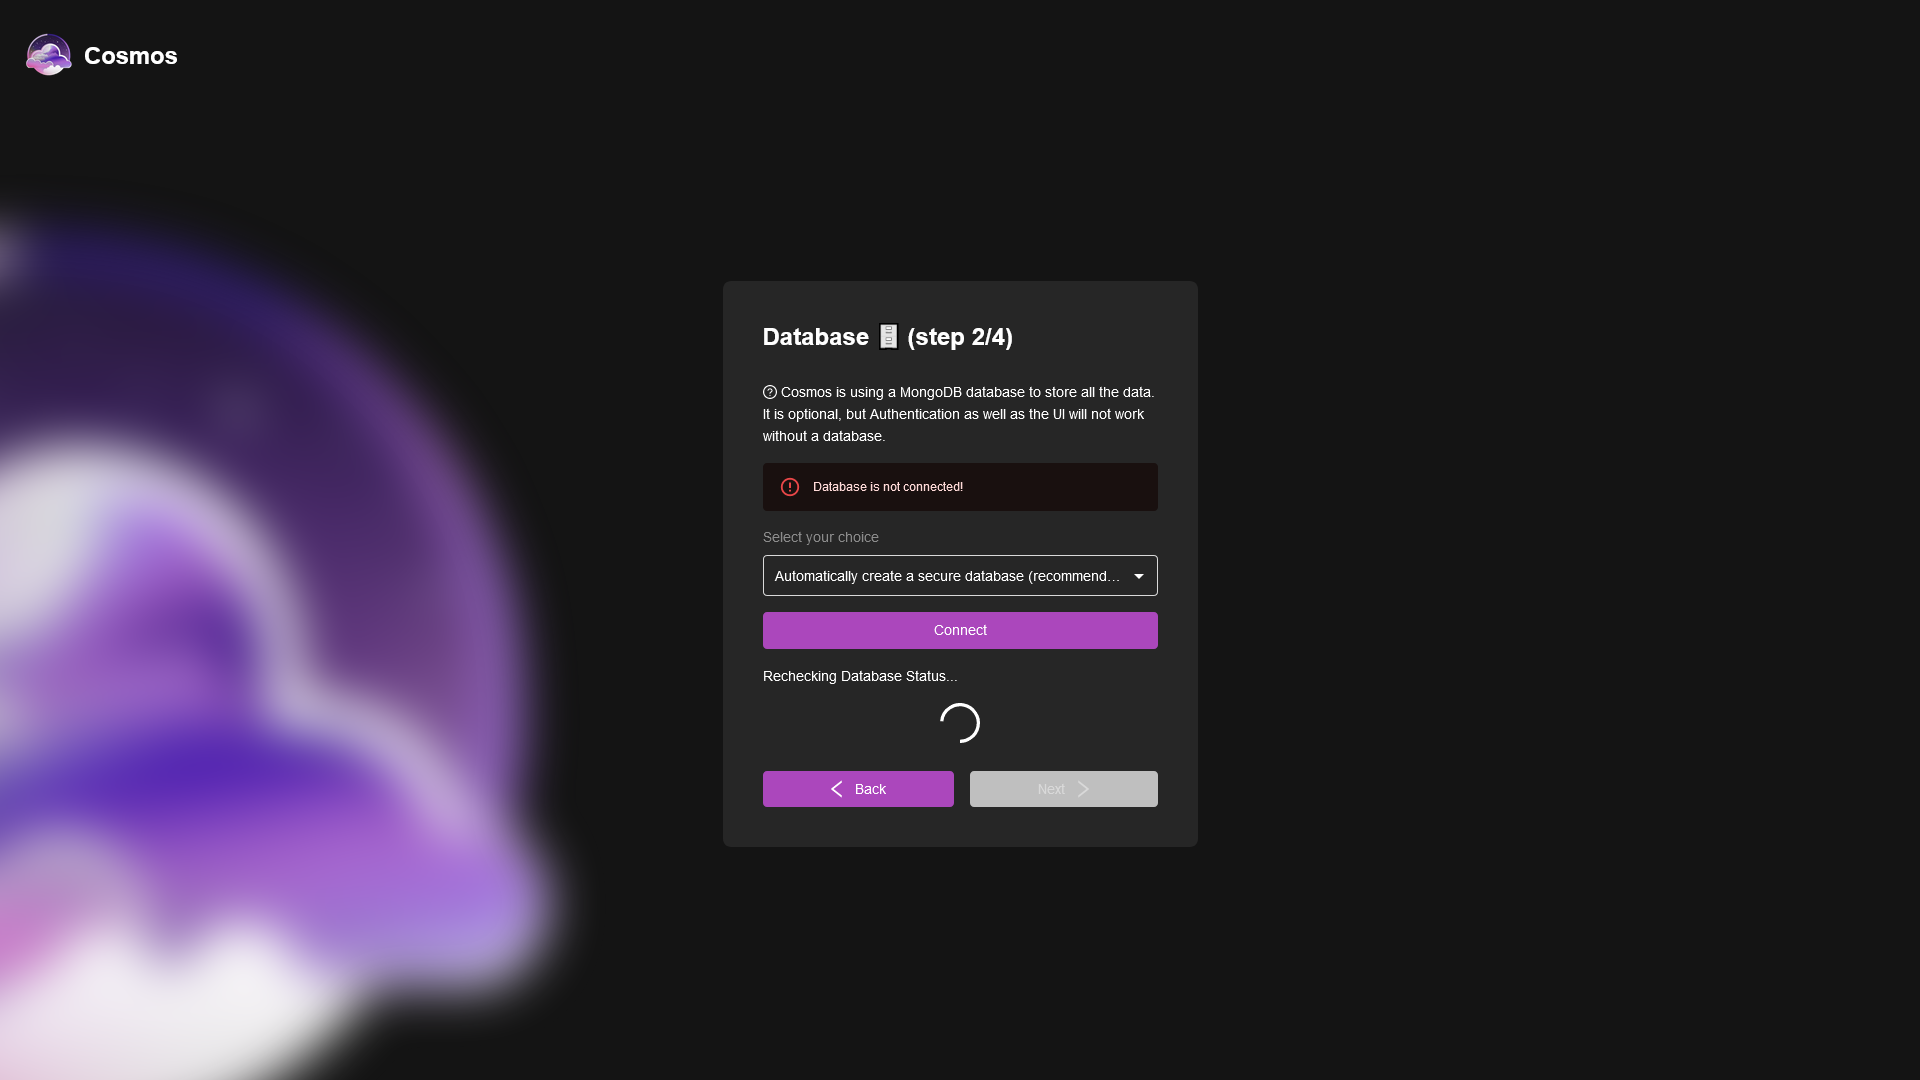
You have multiple choice. The recommended choice is to let Cosmos handle the creation of the database. Leave the default option and simply press Connect to create the database. It can take up to a few minutes so be patient!
Otherwise, you can use an existing database by inputting a value like
mongodb+srv://<username>:<password>@<cluster-address>
Once connected, let's get to the next step!
Step 5: Configuring Your Domain Name
If you are a beginner in selfhosting, you might have already setup some software in a very basic way. One of the thing you might have noticed, is that by default, if you just start a container and access it, your browser will complain about it not being secured. That's because your connection to the container is not encrypted (using HTTP instead of HTTPS). Nowadays it is extremely (I wish there was something stronger than bold to highlight this word) unrecommended to run any service through HTTP ever.
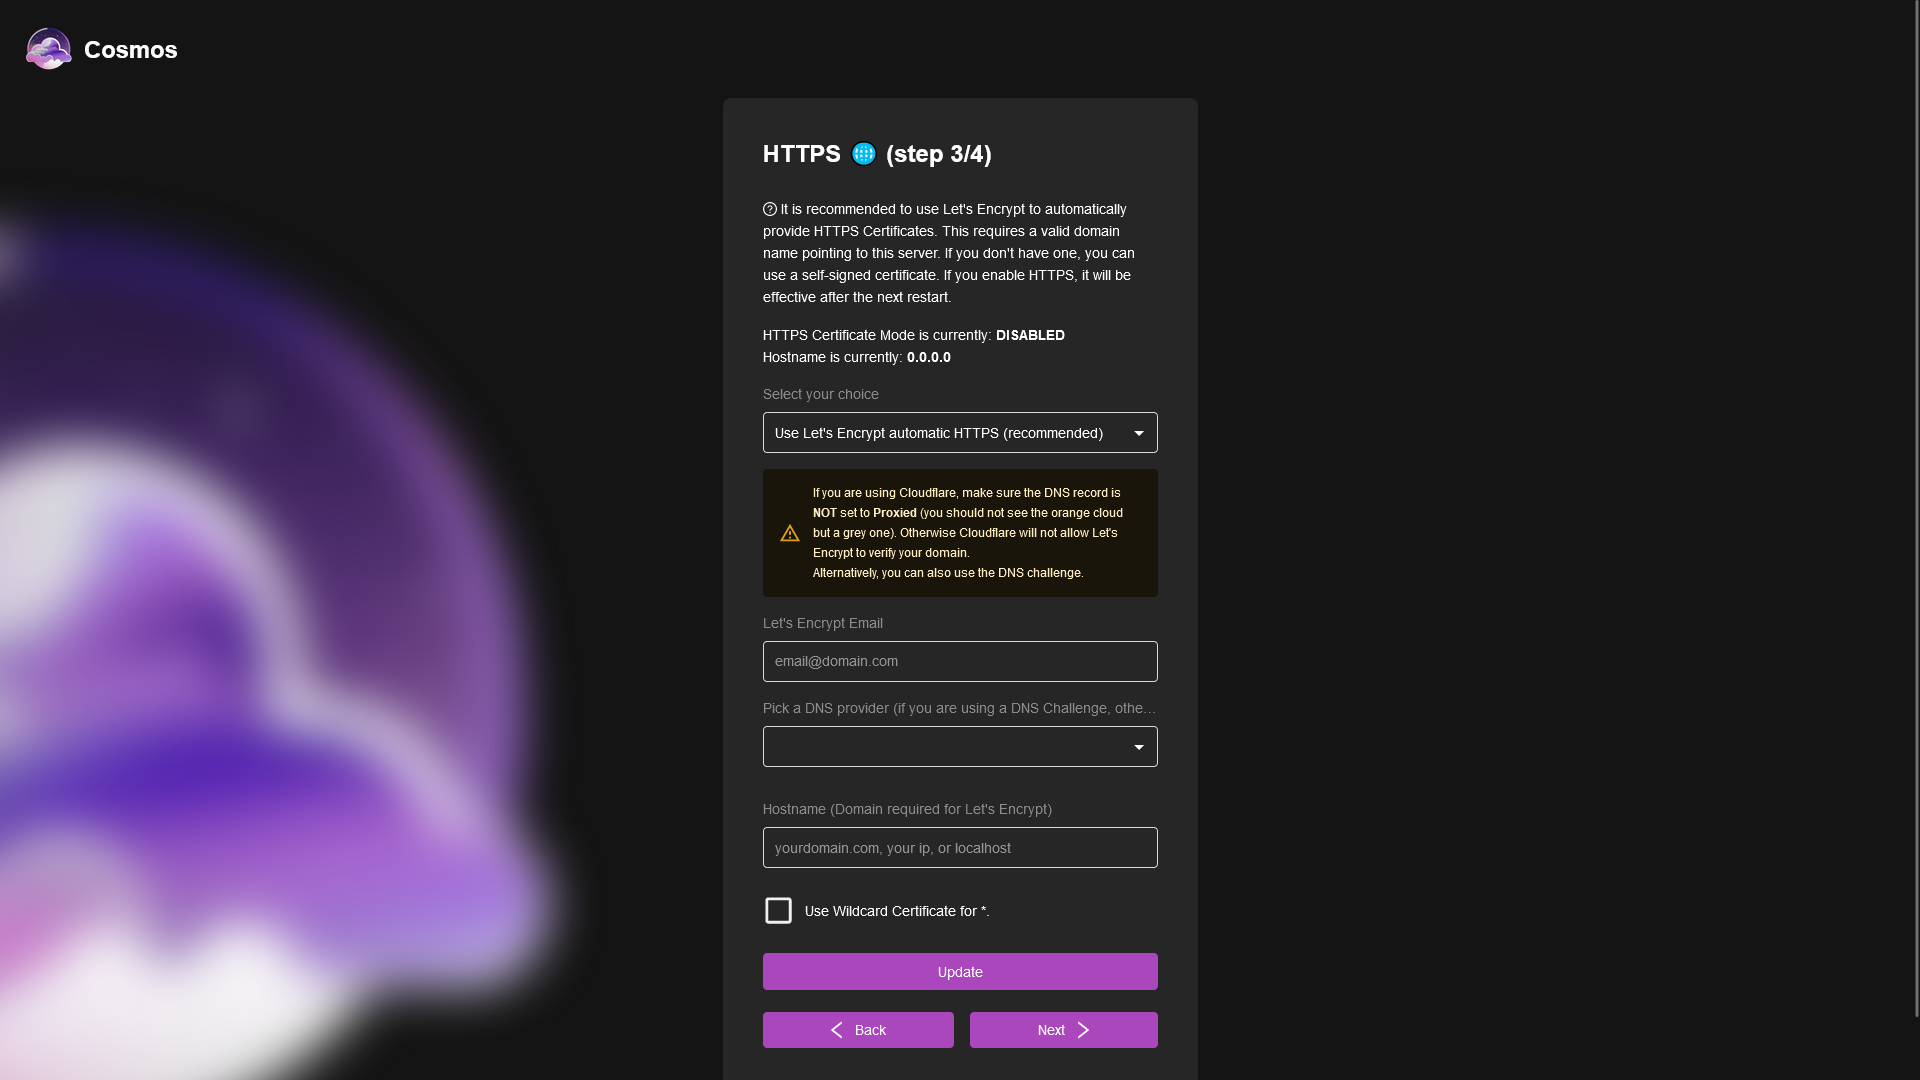
But before we hop into HTTP(S) talk, let's talk about domain names. You can already access your server based on its IP, but generally you don't want to do this: you want to use a domain name that can wrap and streamline access to your resources. It makes management easier, and encryption more secure.
Using a public domain name + a Let's Encrypt HTTPS certificate is the most secure your Cosmos instance can be with the basic expected setup
In order to use a domain name with Cosmos, you can order a domain pretty much anywhere, and setup the DNS A entries to point to the Cosmos IP. If you wish to do that, now is a good time! You only need a single entry at that point, the root. Remember that has you go, you will need to add additional entries there, for example if you want to use nextcloud.domain.com, you need a new nextcloud A entry pointing to your IP as well. If your domain provider supports it, you can use an additional wildcard A entry instead (with * as name) that just means "every subdomains will go to this IP".
If you are using Cloudflare when adding entries to your DNS, please disable the cloudflare proxy (the little orange cloud icon) before continuing
After your domain is setup, you have two choices to use HTTPS. The "normal" way is to have a third party ensure the security of the encrypted connection. What it means is that a third party (here, Let's Encrypt) that is recogized by your browser as a trusted party, will ensure that you are always talking to your server with proper encryption and no one listening (attack of type "man in the middle"). This is easily achieve, once your domain is setup to your Cosmos instance by enabling Let's Encrypt certificate in the setup and giving an email address.
If for some reason you do not wish to do this, the alternative is to use a self-signed HTTP certificate. Please note that this is nowhere near as secured as there are no way for the browser to verify the integrity of the encrypted connection.
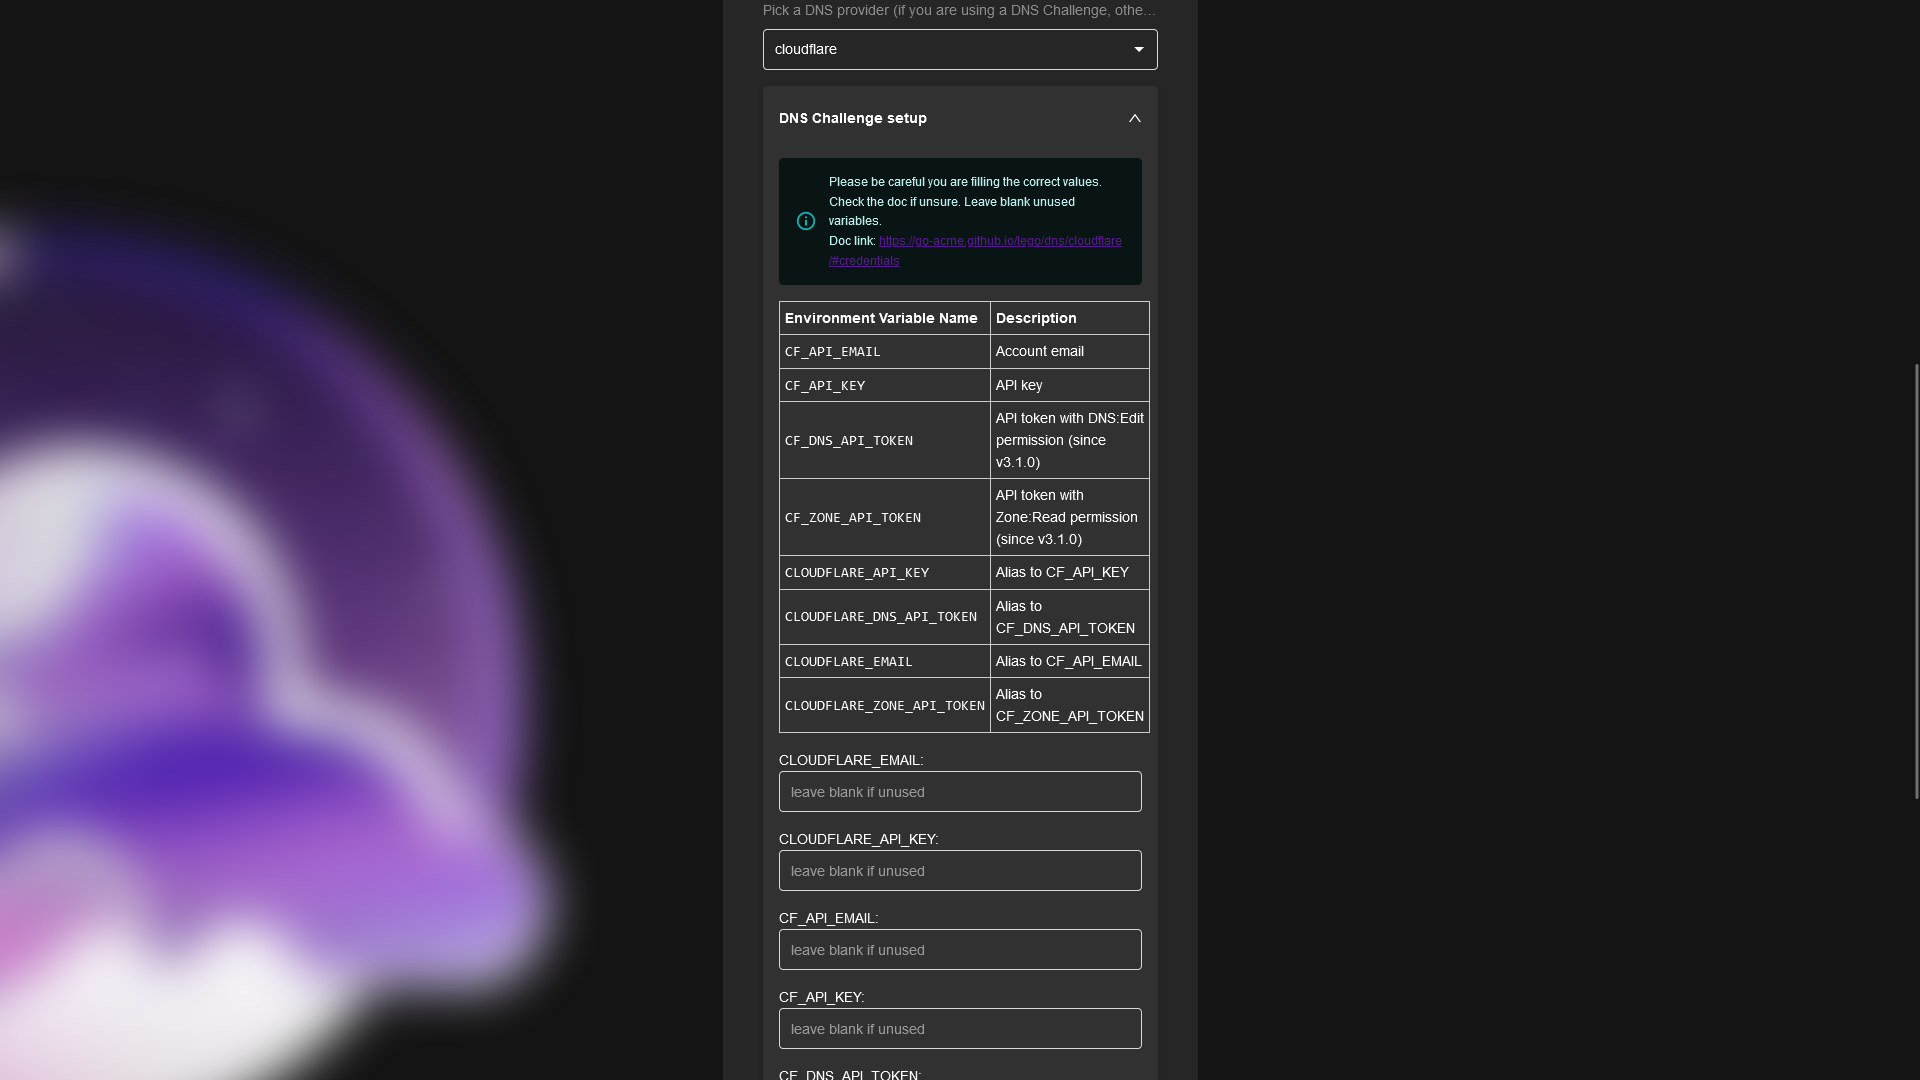
Finally, if you use Let's Encrypt you will see an option for Wildcard certificate. This is very useful as it allow you to get a single certificate, that covers every subdomain you might use (ex. plex.domain.com, jellyfin.domain.com, etc...). In order to set it up, make sure your domain/DNS provider is supported (is in the list), and set up the API KEYS necessary. Each provider is different, when you select it in the list, Cosmos will give you more infos about what you need to do. Please note that Cloudflare has API Keys and Tokens don't mix them up! Also Namecheap requires you to whitelist your IP before using the API.
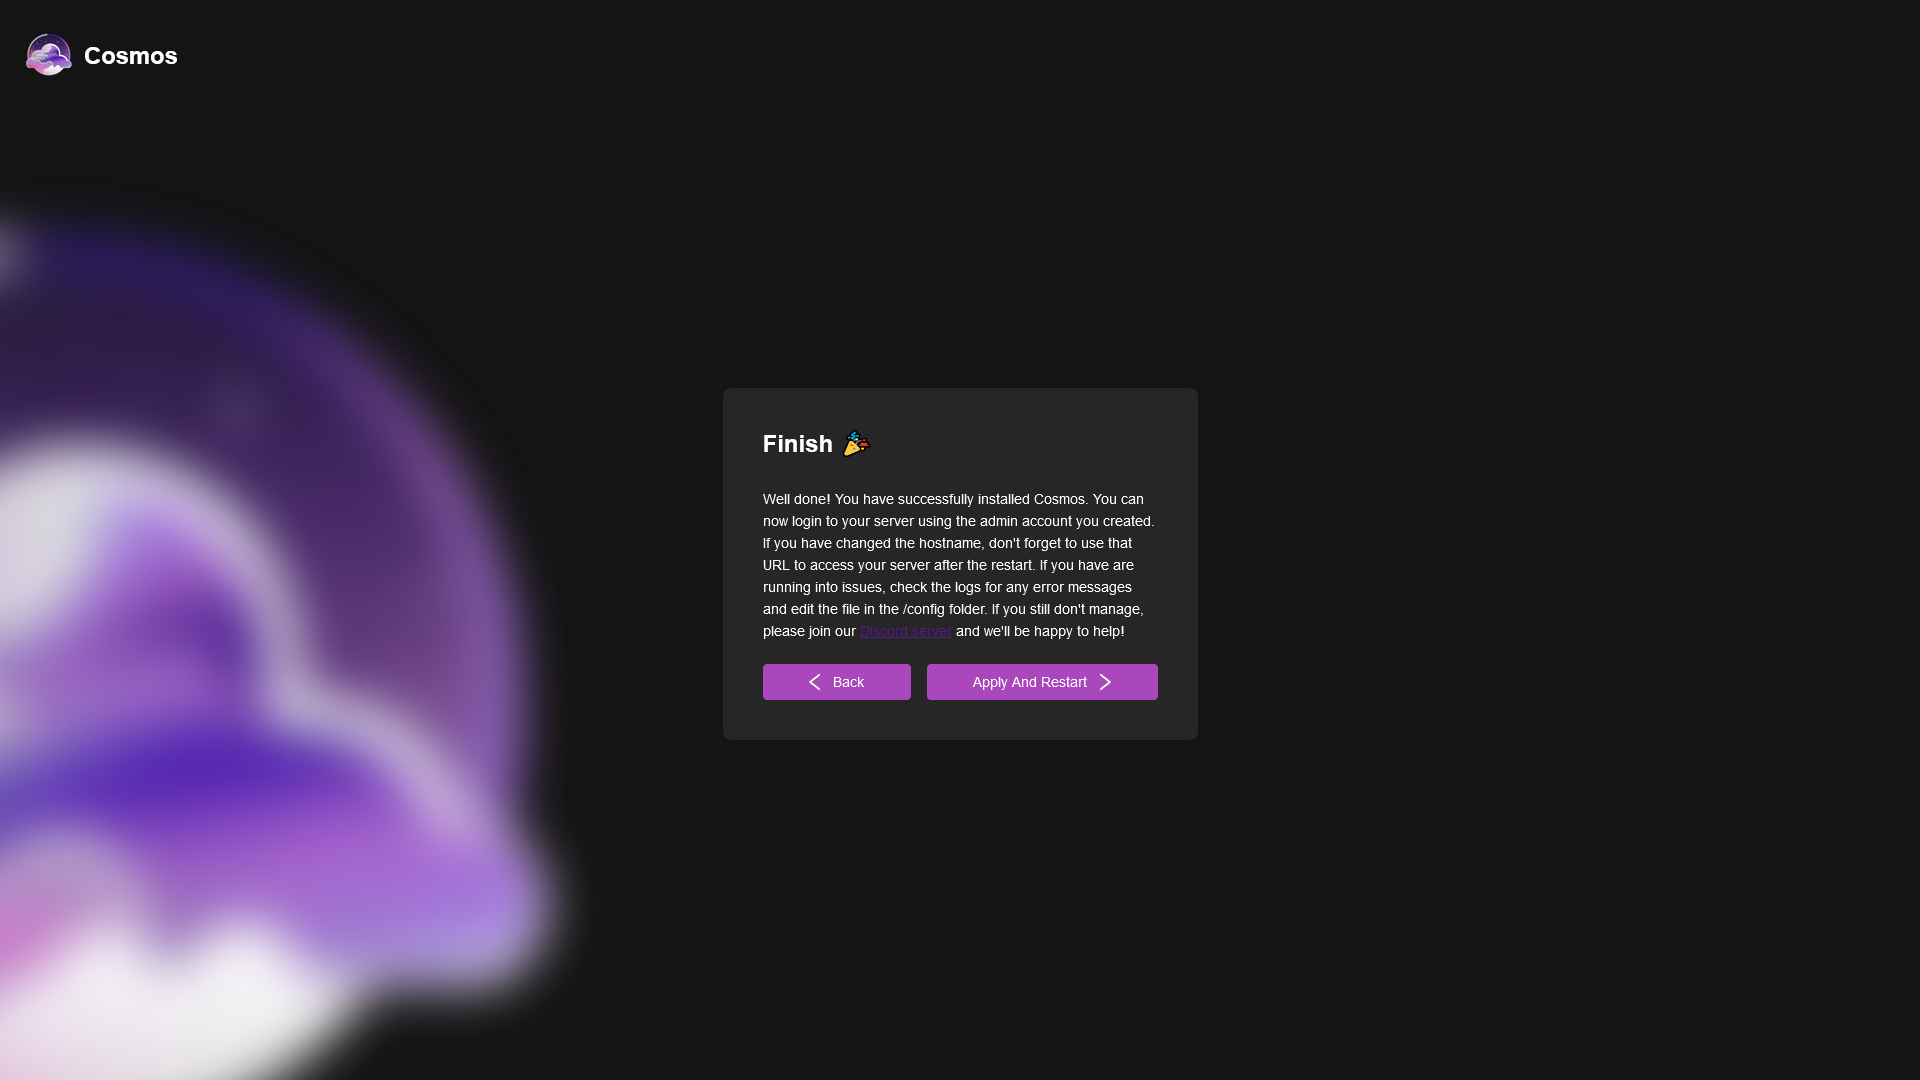
Step 6: Wrapping up
The last step is very easy: create an admin account and then you're done! Remeber from this point that you will no be able to use your IP anymore to access your instance, use your domain instead!
Step 7: Exploring Cosmos Cloud
Now that you've set up Cosmos Cloud and configured your domain name, you can start exploring its features. Don't forget to customize your interface! Here are a few things you can also do:
-
Manage Docker Containers: Cosmos Cloud provides a simple interface for managing your Docker containers. You can start, stop, and restart containers, as well as view their logs and settings.
-
Install Applications: With the Cosmos Market, you can easily install a variety of applications on your server. Just choose an application, click the install button, and Cosmos Cloud will take care of the rest.
-
Set Up URLs: Cosmos Cloud includes a built-in reverse proxy that allows you to set up URLs for your applications. This means you can access your applications from the internet without having to open ports on your router.
-
Manage Users: You can create and manage users in Cosmos Cloud, allowing you to control who has access to your server and what they can do. For added security, you can enable two-factor authentication (2FA) for user accounts
Conclusion
Setting up your own server might seem complicated, but with Cosmos Cloud, it doesn't have to be. Even if you're new to Docker and self-hosting, you can get your server up and running in no time.
In future articles we will dive deeper into other concepts such as the market, the URLs and the cosmos-compose system. Stay tuned!
Don't forget to follow the project on your favourite social media platform or via the newsletter!